If you want to make your website fully secure you will need to add SSL to it.
NB. Cloudflare may change how things work so if in doubt always check their support centre at https://support.cloudflare.com
Follow these instructions.
1. Sign up for a free account with Cloudflare
2. Add your domain (you don't need to use the "www." part e.g. smartlittleweb.com)
3. Select the FREE plan
4. You will now see a screen with all your domain's DNS settings, you should be able to leave everything unchanged. The main thing is that the A record and the www record are set up as "http & DNS proxy"
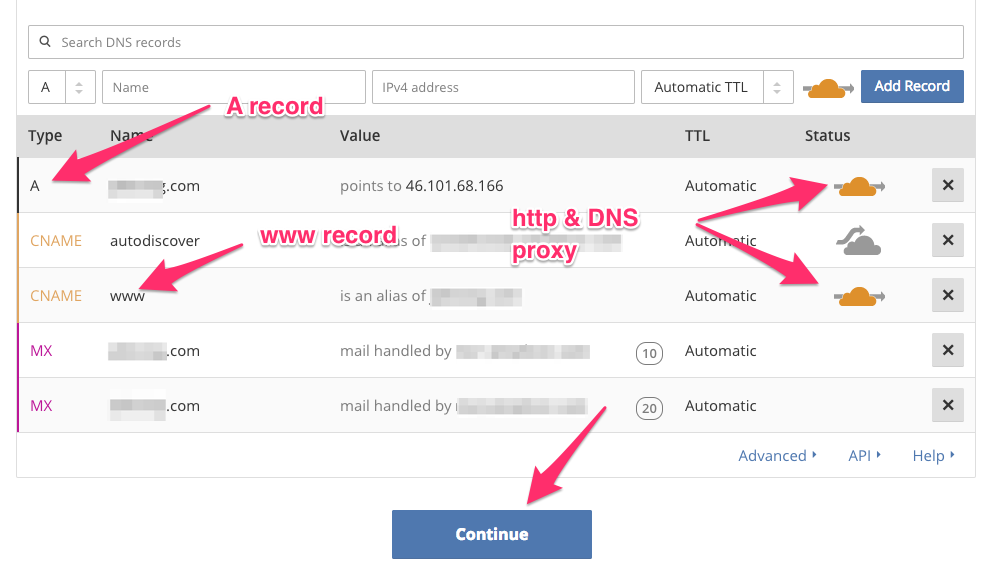
5. Click the continue button
6. Next you will see the new name servers you need to use
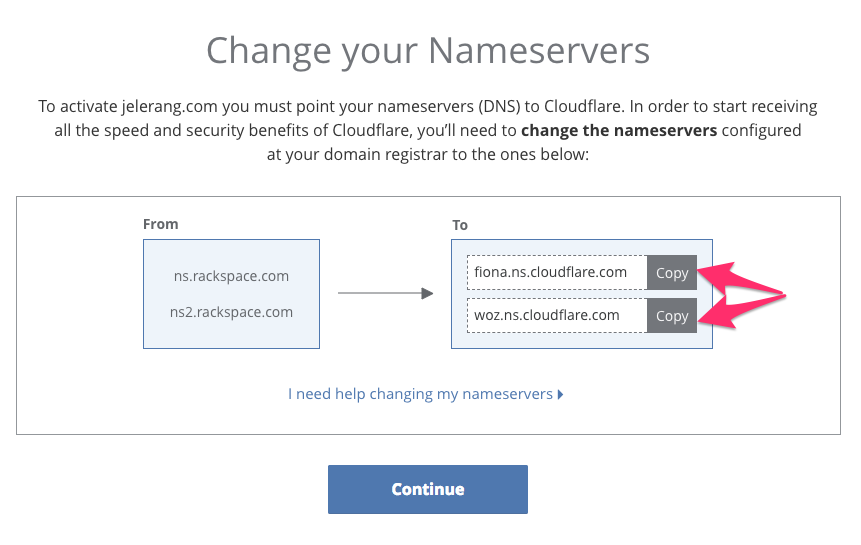
7. If you have your domain hosted with Smart Little Web, Raise a new ticket and include the two new name server addresses, e.g. fiona.ns.cloudflare.com & woz.ns.cloudflare.com
8. If you control your domain you will need to follow the instructions provided by your domain host to update the servers.
NB. it takes 24 to 48 hours for the change to take effect
9. Click "Continue"
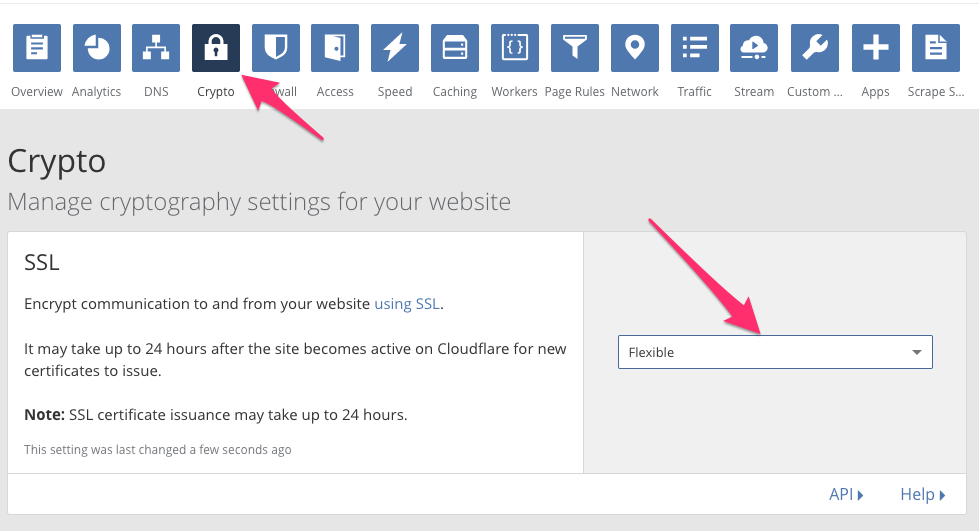
10. You need to change 2 settings under the "Crypto" tab
11. Update the SSL to "Flexible"
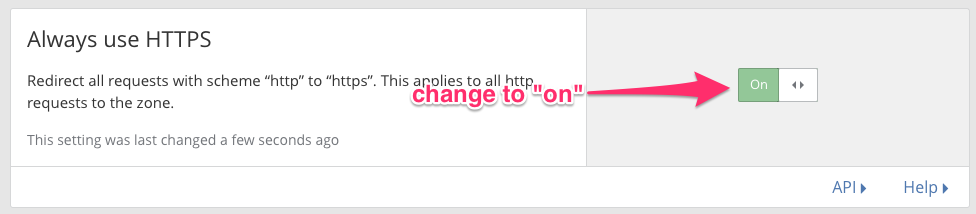
12. Next change "Always use HTTPS" to "On"
13. Wait for 24 to 48 hours
0 Comments